Adjustable Prosthetic Leg - V2
Another one-size-fits-all 3D printed leg.
Ethan Shute, Incept 3D
Description
A stronger, sleeker, and more functional version of our 3D printed prosthetic leg.
Introduction
A few months ago, we designed a fully adjustable 3D printed prosthetic leg meant to accommodate any size. After getting some feedback, we’re excited to immediately introduce version two. Let’s get into it.
To significantly increase the strength, we swapped out our plastic core with a massive, steel screw. Also, our aesthetically redesigned shin is now printed from a carbon fiber nylon blend.
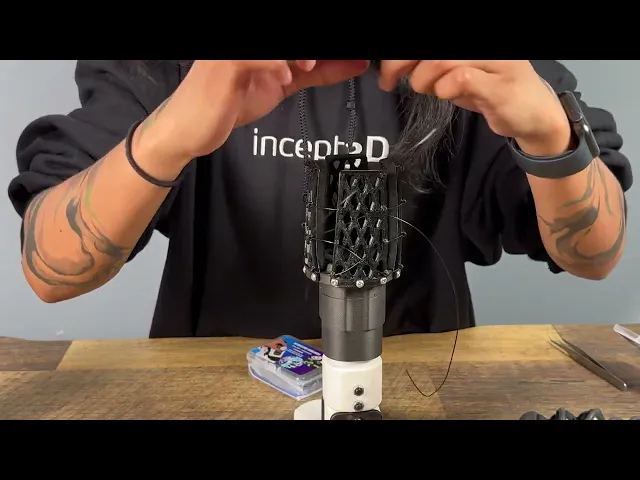
Next, let’s move up the leg, to the socket of the prosthesis. Using TPU diamond-slotted flaps laced with a specialized cable and micro-adjustment dial system, you can easily and evenly fit and form the connection to any size or shape with a comfortable and secure attachment.
And finally, let’s move all the way down to our revamped, dynamically responsive feet. With this new, sporty design, we made sure you can easily swap them out with a different size or density anytime.

Problem Statement
After initial testing, we quickly realized that Version 1 was far too large, fitting only adults. The primary goal of the leg is to grow with the user, as children often outgrow their prosthetics in just a few months. We missed the mark on that, and while we were developing a smaller version, we took the opportunity to give it a complete redesign.
Project Goal
A full redesign that’s stronger, sleeker, more functional, and modular enough to fit any size.
Team Members
Ethan Shute – Designer, Fabricator, and Hand Model
Files and Videos
To access the files for this project, check out our models on Makerworld:


⚠️ Disclaimer
If you want to build this yourself: This prosthetic leg design is an experimental prototype and is provided as-is for educational and developmental purposes only. It is not certified, approved, or tested for clinical, medical, or long-term use.
Build Guide
IMPORTANT! Please read before starting:
Each leg comes with multiple different sized feet to accommodate different foot sizes. Under "Download STL/CAD Files" in the Makerworld dropdown, we have provided a 3mf for sizes 3, 5, 7, 9, and 11 called TPU Feet Sizes 3-11. Please print the size that works best for you!
This project requires different materials for different applications within the prosthetic. In order to print this project properly and safely, please print the right files with the right materials, referencing the Slicer Settings in the below Build Guide or the names of the .3mf files in Makerworld.
To begin, choose your size. While there are no strict size guidelines and every foot size fits on every size of leg, we found the general guidelines to work well for us:
Child: 4-12 years old
Junior: 13-17 years old
Adult: 18+ years old
Child
Junior
Adult
Bill of Materials
Slicer Settings
Assembly Steps


As a final step, you'll need to install the micro-cable adjustment system. This is best explained in video form, as shown below. The video also includes instructions on size adjustment for when your child grows.